| Kiêm tra độ cứng và tổ chức tế vi | Chất rắn |
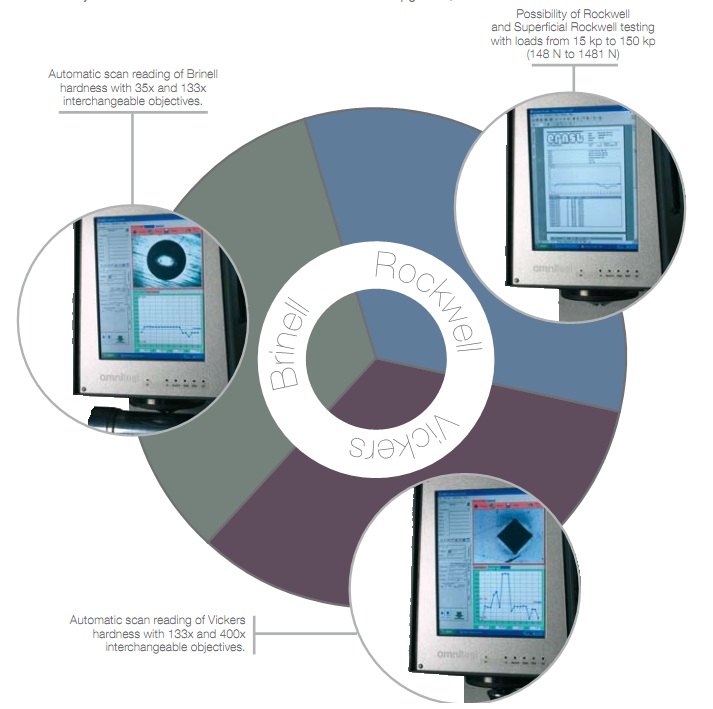
| Độ cứng Brinel (HB) | Thép |
| Độ cứng Rockwell (HRA, HRB, HRC...) | Gang |
| Độ cứng Vicker (HV) | Nhựa |
| Độ cứng Micro vicker (HV) | Cao su |
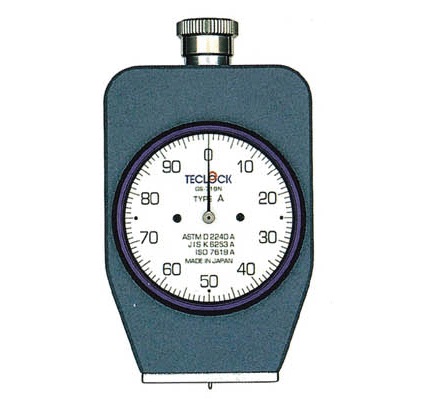
| Đo cứng cao su nhựa Shore (Shore A / Shore D) | Giấy |
| Đo cầm tay kiểu nhấn | Bê tông |
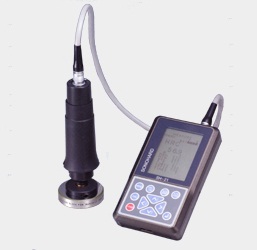
| Đo cầm tay kiểu nẩy | Xi măng |
| Đo cầm tay kiểu siêu âm | Ceramics |
| Dệt sợi bao gói | |
| Máy cắt mẫu | ... |
| Máy cắt mẫu chính xác | |
| Máy đúc mầu | |
| Máy mài và đánh bóng mẫu | |
| Kính hiển vi soi kim tương | |
| Kính hiển vi soi kim tương chiếu ngược | |
| Phần mềm và các mẫu tổ chức tế vi | |
| Kiểm tra ngầu mối hàn .... |
Automated Knoop/Vickers hardness tester
Automatic indentation measurement:
HV (Vickers) and HK (Knoop)
Measurement method: Quadratic curve regression
Measurement time: 0.3 seconds
Measurement reproducibility:
±0.5% (0.1μm) (objective lens 50X,
diagonal line 11 - 45mm, 500HV)
Manual measurement method:
Video line measurement of HV
(Vickers) and HK (Knoop)
Conversion
Hard steel: HV, HK, HS, TENS, HRA, HRC, HRD,
HR15N, HR30N, HR45N
Soft metal: HV, HK, TENS, HRA, HRF, HRB, HRG,
HR15T, HR30T, HR45T
OK/NG judgment: Calculated at measurement
Image save: Available on each operation screen
Center marker: Display function ON/OFF
Measurement data save: Saved in text format (CSV format)
Can be processed with data
processing macros
Functions: Power turret control, Test force
dwell time control (5 to 99s),
Illumination level switch (15 levels),
Loading speed level switch (4 levels),
Indentation control
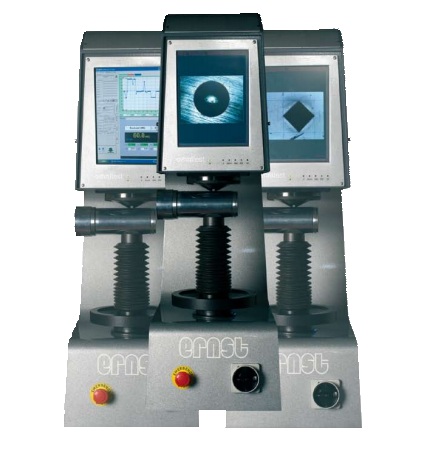
Auto-reading hardness tester
Automatic indentation measurement
Measurement reproducibility:
±0.5% (0.1μm)
Measurement method: Quadratic curve regression
Measuring time: 0.3 seconds
Resolution: 0.1μm
Manual measurement function:
Measurement method with video line
X-Y automatic stage
Stage area: 130x130mm
Movement range: 50x50mm
Minimum step: 1μm
Software functions
Patterned measurement: Line, staggered, 3-point staggered,
matrix, circle, arc, random
Teaching measurement pattern setting
Hardness calculation function
Hardness conversion function
OK/NG judgment
Analysis software functions: Device condition display,
Measurement data display,
Statistical calculation,
Graph display
Dimensions (W x D x H) / Mass
AAV-503 / AAV-504: 665x516x1000mm / 91kg
Hardness tester
Technical Data
Test force range: 98.07, 245.2, 490.3, 980.7, 1961,
2942, 4903, 9807mN
Test force setting: By dial
Loading accuracy: 1% (forces less than 9.807mN are ignored)
Load control: Automatic (load, dwell, unload)
Load dwell time: 5 - 30 sec: HM-101
5 - 60 sec: HM-102, HM-103
5 - 99 sec: HM-112, HM-113
XY stage
Stage size: 100x100mm
Travel range: 25x25mm, with micrometer heads
Resolution: 0.01mm: HM-101, HM-102, HM-103
0.001mm: HM-112, HM-113
Max. specimen height: 95mm
Max. specimen depth: 150mm (from the center of indenter)
Indenter/objective turret: Manual type
Indenter mounting: 1 position
Objective mouning: 2 positions (10X, 50X)
Optical path: 2-way (measurement / exposure)
Resolution: 0.1μm (0.2μm: HM-101)
Data output: RS-232C, Digimatic code (SPC) and
Centronics
Power supply: 100/120/220/240V AC, 50/60Hz
Dimensions (W x D x H)
Main unit: 410x600x590mm
Control unit: 165x260x105mm
Mass (main unit): 42kg
Mechanical Rockwell hardness tester
FEATURES
The newly designed frame provides
maximum clearance for positioning the
workpiece. A flat table is all that is needed
for mounting these testing machines.
Simple to operate
With analogue type (HR-110MR, HR-
210MR), the gauge presetting operation
is unnecessary by the adoption of an
automatic presetting dial gauge.
HR-110MR does not require a power
source, and is considered to be
environmental friendly.
The digital type (HR-430MR and HR-
430MS), with the adoption of the
automatic steering wheel brake & the
automatic load sequence, with only simple
handling test possibility.
Universal hardness tester
MZT-500
The indentation factor can be obtained, which is related to
the hardness value (partially) shown in Martens hardness
test (ISO14577) and Youngs modulus. Deformation
characteristics in the load, dwell, and unload phases are
also obtainable for use in determining properties of the
specimen material.
• Hardness tests such as Vickers and Knoop hardness tests
are supported.
• The balance lever vibration isolation mechanism reduces
the effect of external vibrations on measurements.
• Indenter indentation depth can be measured up to a
maximum of 20μm with a resolution of 0.1nm.
• Test forces between 0.1mN and 1000mN can be applied
electromagnetically for evaluation of material properties in
submicroscopic areas.
• Field-compatible form with cover for protection against
dust and wind.
Rockwell hardness tester
max. 1471 N | HR-521/523 Series
Technical Data
Preliminary test force: 29.42N, 98.07N
Test force
Rockwell superficial: 147.1, 294.2, 441.3N
Rockwell: 588.4, 980.7, 1471N
Brinell*: 61.29, 98.07, 153.2, 245.2, 294.2,
306.5, 612.9, 980.7, 1226, 1839N
Test force setting: By control unit
Load control: Automatic (load, dwell, unload)
Load dwell time: 0s - 120s (1s increments)
Max. specimen height: 205mm (for standard flat anvil)
Max. specimen depth: 150mm
(from the center of indenter shaft)
Stage elevation: Manual or power drive
Control unit: Sheet-switch type or touch-screen
type
Data output: RS-232C, Digimatic code (SPC) and
Centronics
Power supply: 100/120/220/240V AC, 50/60Hz
Dimensions (W x D x H)
Main unit: 250x670x605mm
Control unit: 165x260x105mm
Mass (main unit): 65kg
*HR-511, HR-521: 1839N only
Vickers hardness tester
max. 490.3 N | HV-112/113/114/115 Series
FEATURES:
- A wide range of test forces from 1.961N to 490.3N* (.2kgf - 50kgf) is available for measuring a wide variety of specimens. The load duration can be set in 1sec increments between 5 and 99sec. The minimum reading of indentation is 0.1. It allows small indentations to be measured with high precision.
Micro hardness tester
Test force range:
HM-211: 98.07mN to 980.7mN (9.807mN increments)
980.7mN to 9807mN (98.07mN increments)
HM-221: 0.4903mN
0.9807mN to 9.807mN (0.9807mN increments)
9.807mN to 980.7mN (9.807mN increments)
980.7mN to 19610mN (98.07mN increments)
Test force generation: Electromagnetic
Load control: Automatic (load, dwell, unload)
Load dwell time: 1 - 999 sec (1 sec increment)
XY stage
Stage size: 100x100mm
Travel range: 25x25mm, with digimatic
micrometer heads
Resolution: 0.001mm
Max. specimen height: 133mm
Max. specimen depth: 160mm (from the center of
indenter)
Indenter/objective turret: Motor driven and manual
operation
Indenter mounting: 2 positions
Objective mounting: 4 positions
Optical path: 2-way (measurement / exposure)
Resolution: 0.01μm
Data output: RS-232C, Digimatic code (SPC) and
Centronics
Power supply: 100/120/220/240V AC, 50/60Hz
Dimensions (W x D x H): 400x640x600mm
Mass: 43kg
Inverted metallographic microscope
MA100
Key features
* Durable stage
The three-plated structure provides stable control and superior durability during observation of heavy samples, including embedded samples that are still mounted on a grinders holder.
* CFI60 optics
Nikons proprietary CFI60 optics provide high numerical apertures and longer working distances, delivering bright, high resolution images.
* Polarizer/Analyzer
The single action polarizer/analyzer mechanism can rotate 360 degrees, allowing users to set a polarization direction suited to the sample being observed.
Applications
* Metal Manufacturing
* Automotive Manufacturing
* Metallurg
* Grain sizing
* Cast iron nodularity
* Flake analysis




.jpg)
.jpg)
